
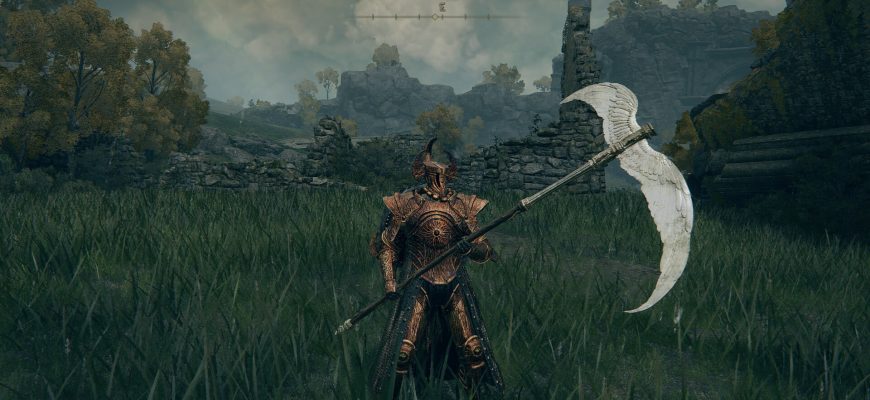
In Elden Ring, Maliketh, The Black Blade is an incredibly formidable opponent and one of the few obligatory bosses in the game that can be encountered at the end of the game in Farum Azul. While Maliketh is certainly one of the most difficult bosses in the game, he is not insurmountable.
Maliket’s attacks are relentless, swift and destructive, leaving you almost no time for reaction or composure, and that is only a small part of what makes him so difficult. However, we are confident that with patience, an understanding of the mechanics, and a solid strategy, you will prevail when all is said and done. After all, you’ve already come this far.
Malekith review
- Location: Farum Azula
- Mandatory: Yes
- Invocations: Players and Ashes of Spirit
- Drop: 220,000 runes, Memories of the Black Blade ! -7-!
- Weakness: ???
At the end of Farum Azula is the legendary boss – Malekith, the black blade. This encounter is optional and must be completed to progress through the story. Since the battle takes place at the very end of your journey, it will be incredibly difficult, so we recommend having a level of at least 90-95 before you even think about fighting him.
Defeating Maliket will give you 220,000 runes and Black Blade Memories, which you can exchange with Enya in the Fortress of the Round Table. In addition, you will gain access to the last boss in the game, which is located in Leindell, the capital of Ash.
Maliket’s attacks

Malekith, the black blade, has a wide range of attacks that hit hard, are hard to react to, and can even get you at long range if you’re not careful. If you hate AoE attacks, ranged attacks, or sporadically moving enemies, you will find it excruciatingly difficult to counter Maliket.
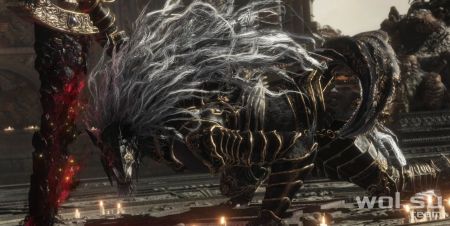
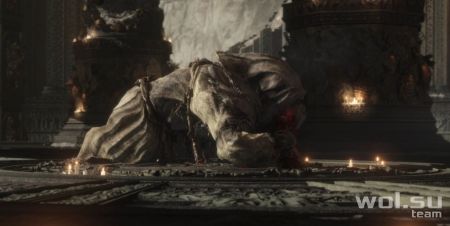
This encounter consists of two phases, in the first of which the boss is called Priest Beast and then turns into Malekith when you reduce his health to half. Both phases are relentless and require concentration and near-perfect execution to win.
Phase 1 – Beast Priest
Stone Blow

The Beast Spiritualist takes his left hand and drags it across the arena floor, picking up stones in the process. Then, immediately thereafter, the spirit beast throws the stones at you with great force, dealing considerable damage if they hit you.
- Tip: Make timely throws and dodge left or right before the stones reach you. You can also hide behind one of the many pillars/piles of debris.
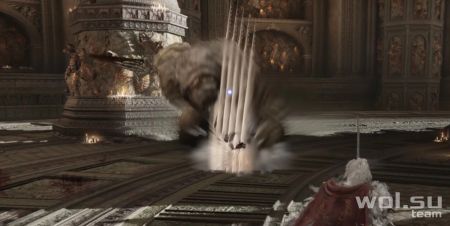
Boulder Toss.
As with the”Throw Rock” attack, the boss will swipe his left hand across the arena floor and then have a large boulder in the palm of his hand, which he will immediately throw at you.
- Tip: Dodge perfectly to the left or right as the boulder approaches you. You can also hide behind one of the many pillars located throughout the arena.
Blows of Fury.
The beast priest holds his sword in his right hand and delivers a series of furious blows. A series of attacks can consist of two to five strikes, forcing you to be on your guard for each strike.
- Tip: Dodge back and keep rolling away from the boss to create distance. Getting hit by this attack can cause death for many players, so it’s better to just walk away from it at all costs than risk it.
Beastly Strike
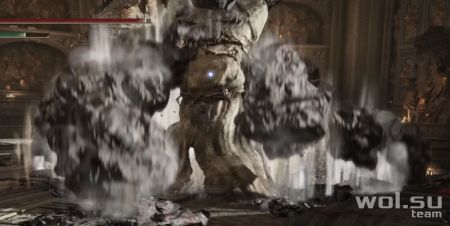
Beaststrike holds the sword in his mouth and then strikes the ground with his hands, causing the ground beneath him to start cracking. After a while, boulders start flying out of the cracks, causing considerable damage.
- Tip: When you see the Beast Priest put his sword in his mouth, run away from him, creating as much distance as possible. Watch for cracks in the ground to dodge boulders.
Claw of the Beast
The beast raises his left hand high into the air, visible lines coming from his claws, then slams his hand on the ground and quickly strikes, sending shock waves at the player. The shockwaves are ferocious and swift and pass through any obstacle.
- Tip: Make throws in time and dodge left or right before the shockwave reaches you.
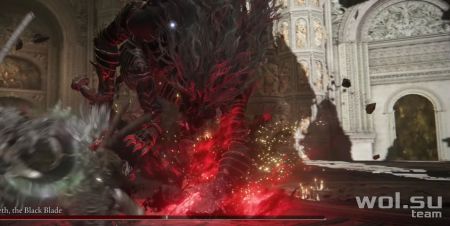
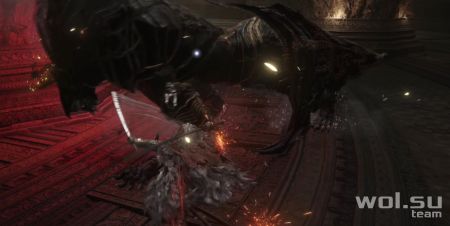
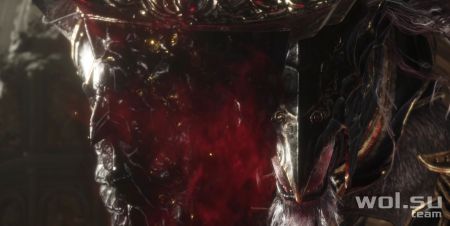
Phase 2 – Malekith, Black Blade
Vertical Waves

Maliket will jump vertically into the air and then unleash red waves from his sword at you. There can be anywhere from one to three waves in this attack, with Maliket always landing next to you in a three-wave combo, then striking a swift blow shortly after.
- Tip: Roll left or right as soon as you see a red wave from Maliket’s sword. If he performs a three-wave combo, you can parry his blow at the end with Blasphemer’s Claw. Otherwise, just dodge the series of attacks, and when it’s over, respond with your own.
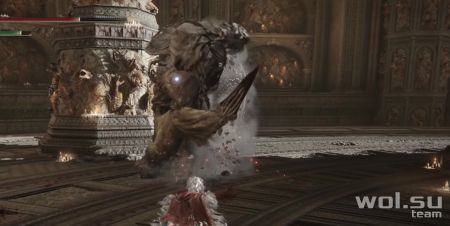
Lethal Boulders.
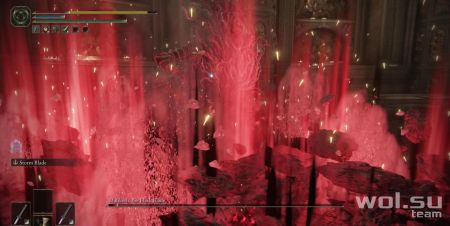
Maliket plunges his sword into the ground, then pushes it deep into the ground, pushing it with all his limbs, causing Death’s disease-covered debris to emerge from cracks in the floor. When he pulls the sword out of the ground, an explosion will follow, so be ready for it.
- Tip: Create distance every time you see Maliket thrust his sword into the ground. Getting hit by this attack is bad news and will likely result in death.
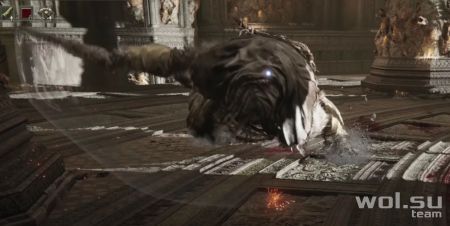
Waves on the ground
Maliket strikes the ground and launches waves across the floor that can instantly kill you if you are low on health. Furthermore, with this attack, Maliket often tries to bait you by striking you on the ground and then jumping high into the air before coming down on you again with a real attack.
- Tip: Because of the pretense, it’s pretty hard to know which attack option you’re going to get. Our advice is to never dodge until the last moment and always roll to the left or right. Throwing too early or too late can be your end game, and if you take the bait, it will only make things worse.
How to defeat Malekith
With Malekith’s fast and unpredictable attacks, he will be a real challenge for both ranged and melee heroes. His attacks hit like a freight train and can even kill you instantly. Worst of all, some of these attacks can appear out of nowhere in the blink of an eye. However, it can be defeated if you approach it the right way.
Hand-to-hand combat strategy
During the first phase of the encounter – when he is the spiritual face of the beast – the best strategy would be to stay near one of the many pillars located throughout the arena. The pillar will block many of the spirit beast’s attacks, allowing you to land many strikes without much risk. Just keep circling around the pillar counterclockwise and bait an attack that will cause the Priest Beast to drag his weapon across the arena floor from left to right. Respond to this attack with a jump shot, and then repeat this process until his health is reduced to half.
As in Phase 1, in Phase 2 you will also want to use the poles to your advantage, but in a slightly different way. Instead of circling around the poles, use them to block Maliket’s many aerial stabbing attacks, then come out from behind them when he lands. You’ll be able to land a few strikes before he telegraphs his next move, and then you can determine your next move. As a rule, posts can block almost all attacks in this phase, and we recommend taking advantage of this fact. Strike only when you know that you are not threatened. It can take a long time to defeat him this way, but using the arena to your advantage is the best way to come out victorious.
Shooting Strategy

In the first stage of the encounter, try to keep your distance between you and the boss. He has some melee attacks that are deadly to those who operate from a distance, so if you let him get too close to you, it will be a nightmare. In this phase, we recommend using fast-action spells such as Stars of Destruction, which strike hard, allowing you to cast them off and regroup. Watch out for the few ranged attacks we detailed above, and you’ll be fine!
For those using ranged attacks, the second phase will be astronomically harder. While we recommend still using fast attack spells that hit hard, we don’t recommend staying too far away from him. Instead, get a little closer and use the poles to your advantage so they absorb all of his air strikes and projectiles. Then, when he lands on the ground, create a safe distance between him and you and throw your punches. This method will take a little longer, but is ultimately the safest. Don’t be in open terrain in this phase, as he has too many attacks that can hit you with a single strike, and he is too strong in more open areas.
General Tips
-
- Reach level 90-95 or higher;
- Use arena poles to your advantage;
- Ranged fighters must use quick spells that deal powerful blows;
- Be patient and watch for his delayed attacks. He has quite a few of them;
- Never attack in open terrain. Maliket thrives in open spaces.

- Atomic Heart. 100% walkthrough of the game - 21. February 2023
- Sights of Kazakhstan, what to see first - 16. February 2023
- How to Get a Titanic Cat in Pet Simulator X – Titanic Cat - 29. December 2022